

Table of contents
- What is Firebase?
- Pre-requisite
- Step 1: Signup for a Firebase account
- Step 2: Configuring Firestore Database
- Step 3: Allowing Anonymous Authentication
- Step 4: Obtaining Firebase Config
- Step 4: Scaffolding the Initial Chat UI
- Step 5: Wiring up the UI
- Step 6: That's it
- Add Chat to your Web App with Dead Simple Chat
This blog was originally published on the DeadSimpleChat Blog: https://deadsimplechat.com/blog/firebase-chat-app-tutorial/
In the blog post, we will go through the process of building a chat application using firebase.
What is Firebase?
Firebase is a type of serverless backend provided by google. It offers a set of services to serve as a backend of mobile or web applications.
It offers services like a NoSQL database, social authentication, notification and real-time communication services.
In following tutorial will use the firebase real-time database as a backend for our chat service.
So, let's get started.
Pre-requisite
To following allow this tutorial you would need:
Basic knowledge of HTML and CSS
Familiar with JavaScript
💡 New to DeadSimpleChat? It's a turn key chat that you can easily add to your website or App —without any complicated code. For Virtual / Live events, SaaS App, Social Platform, Education, Gaming, Finance Sign Up for Free
Step 1: Signup for a Firebase account
If you don't already have a firebase account, go to firebase.google.com and signup for a free firebase account.
Press the "Get Started" button to create a free account
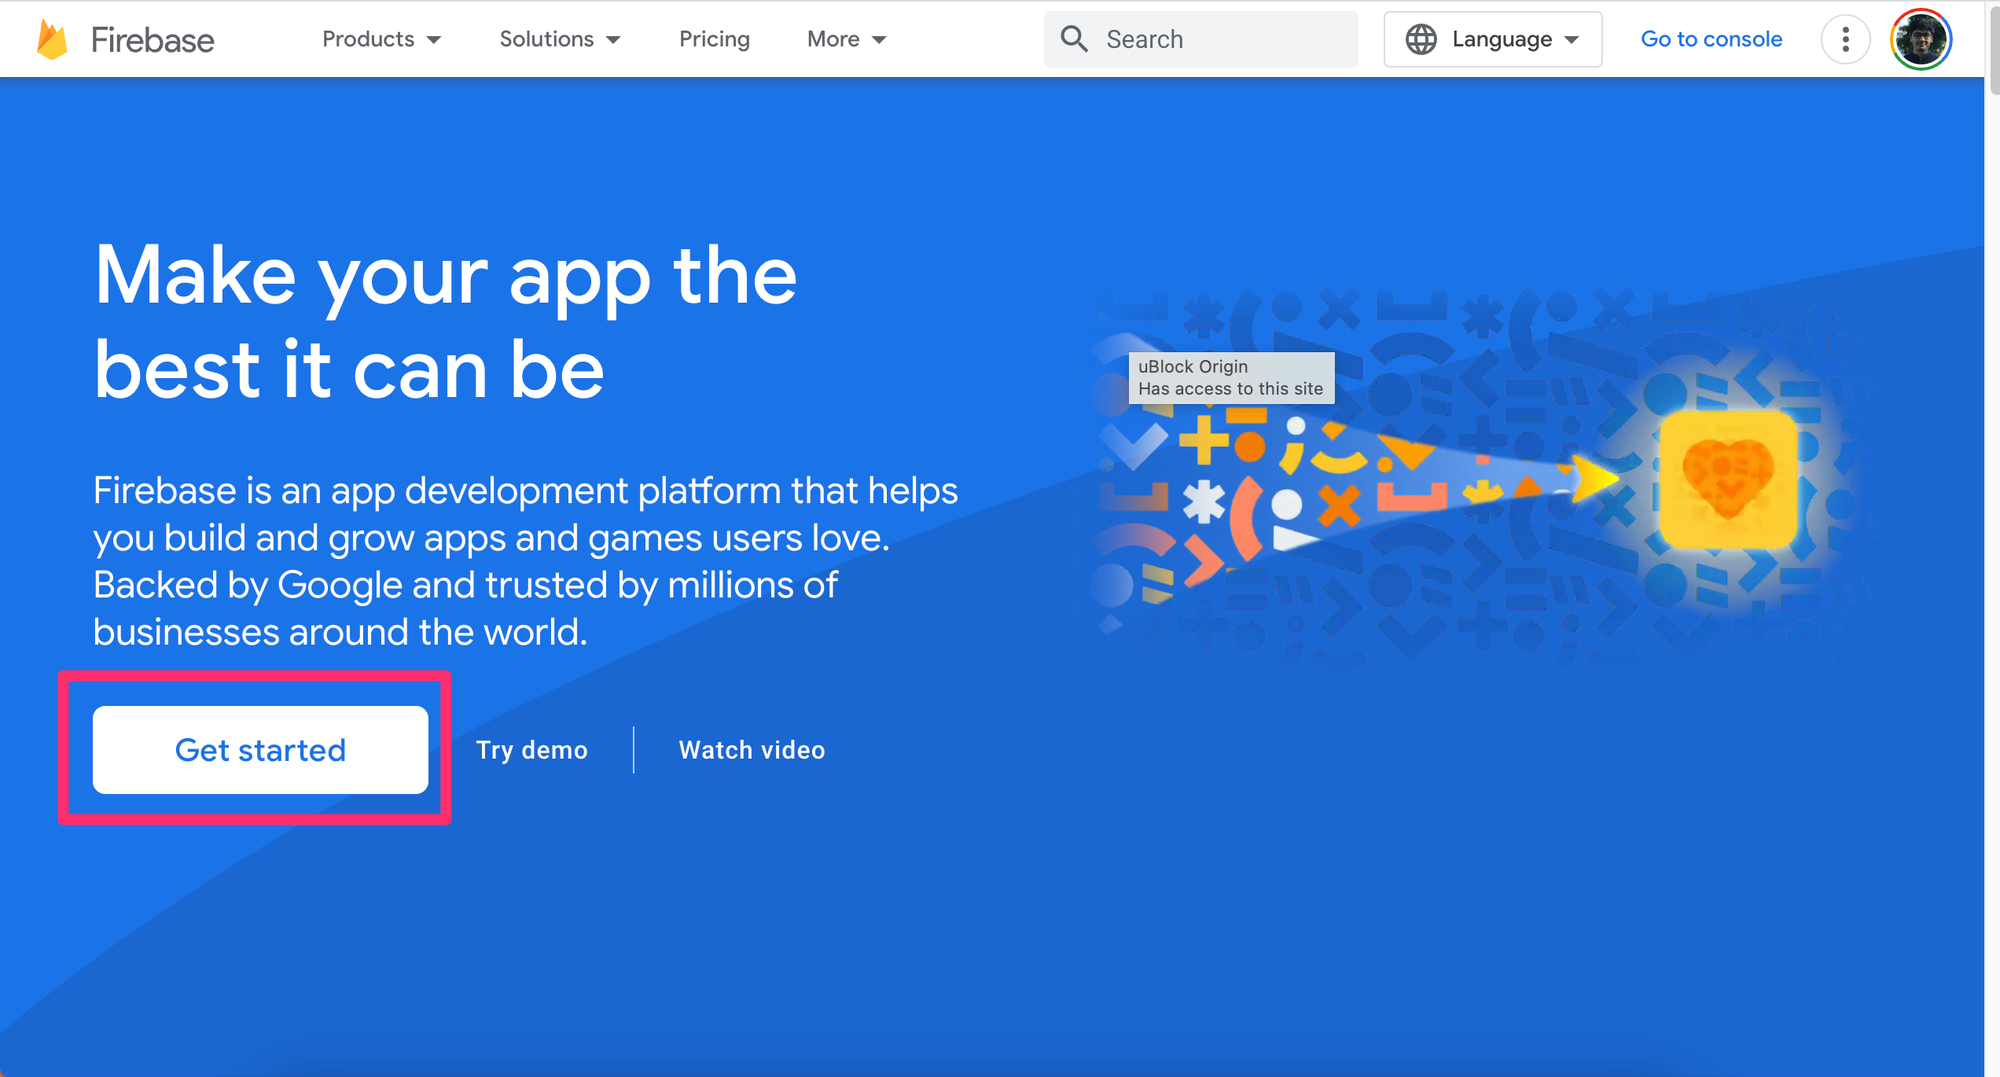
Firebase signup page
Name your project anything you like, we will name our project "firebase-chatapp"
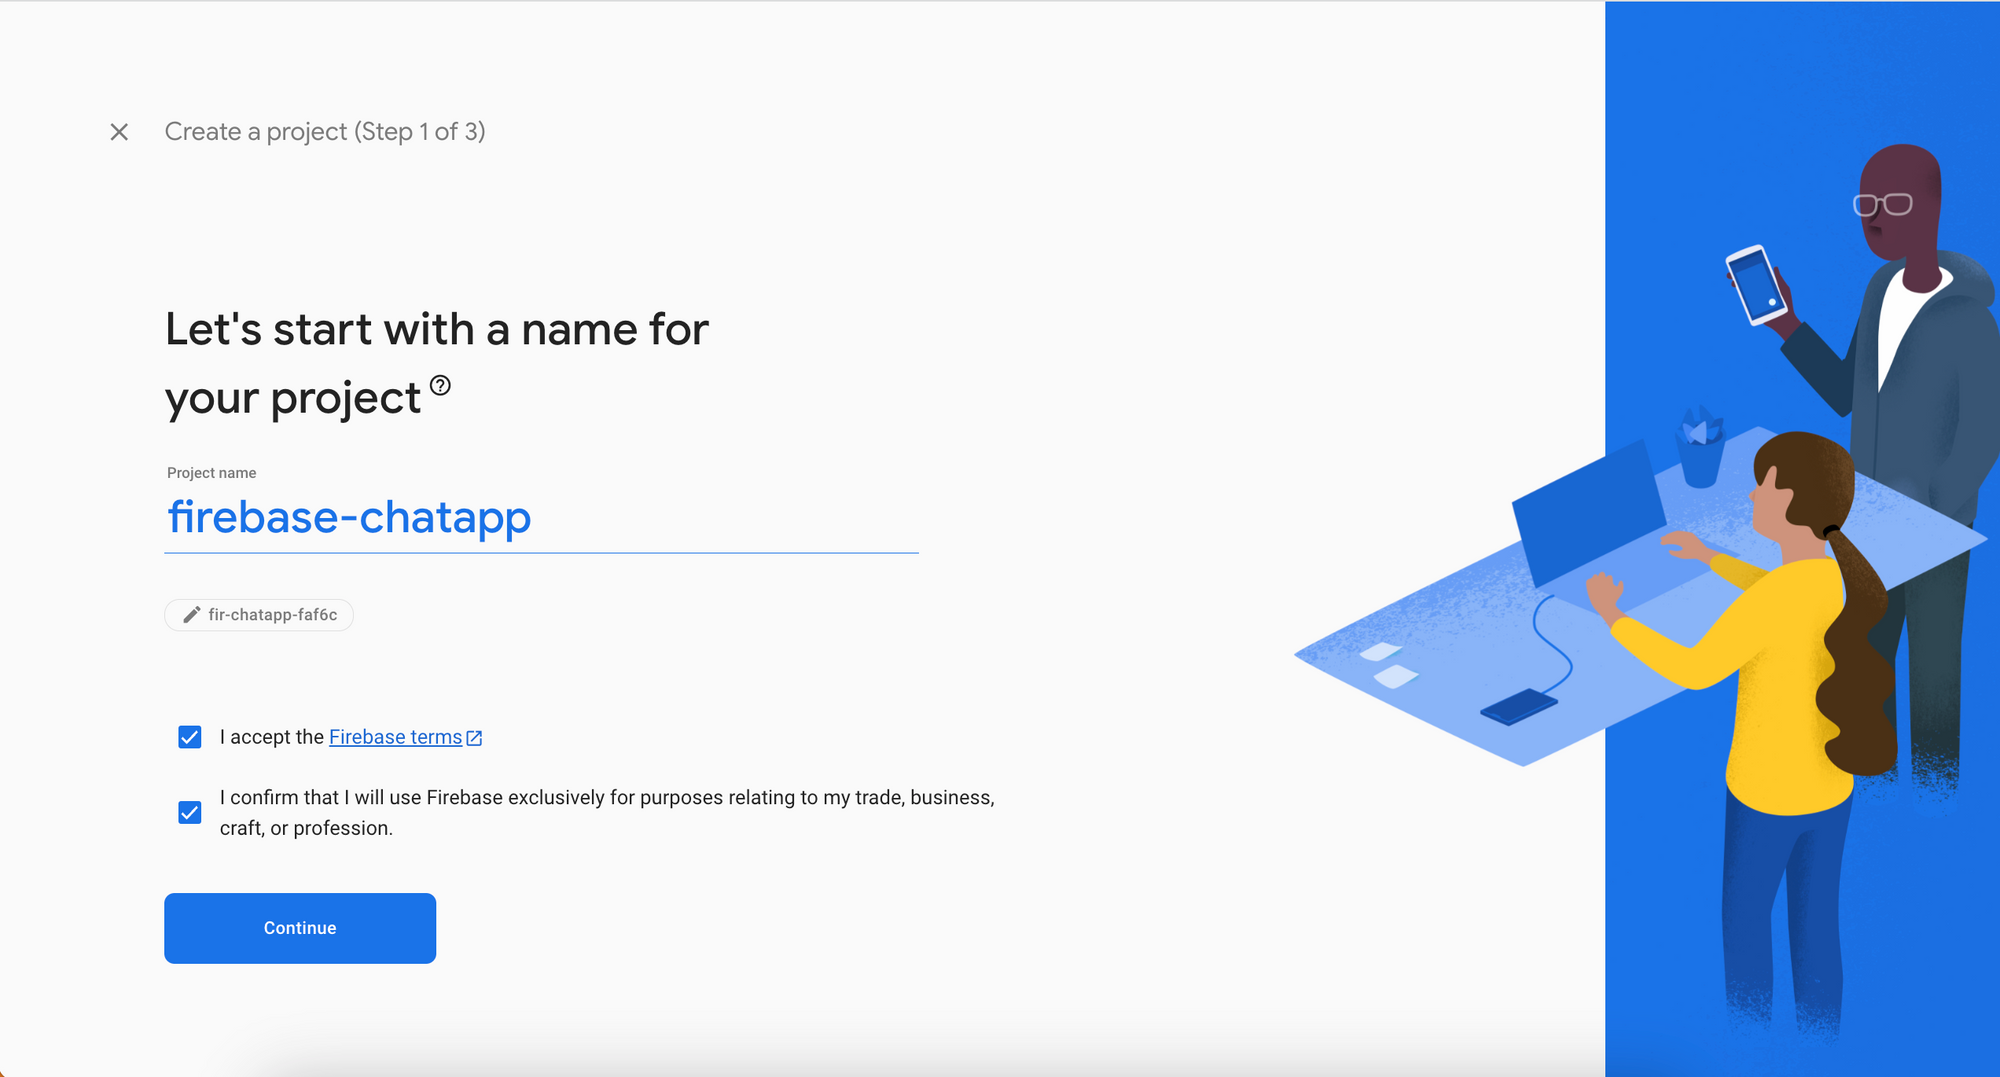
Firebase Create Project
Step 2: Configuring Firestore Database
After creating a firebase account, we will create a Firestore Database, that Firestore Database will store our chat messages, and we will use the database to subscribe to real-time updates.
After creating the project using the sidebar select "Firestore database"
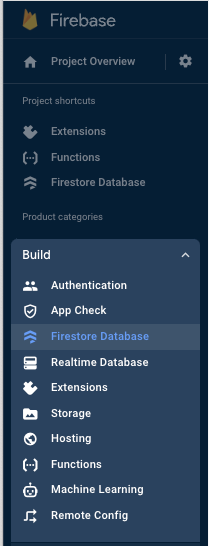
Firestore Database
Then click the "Create database" button
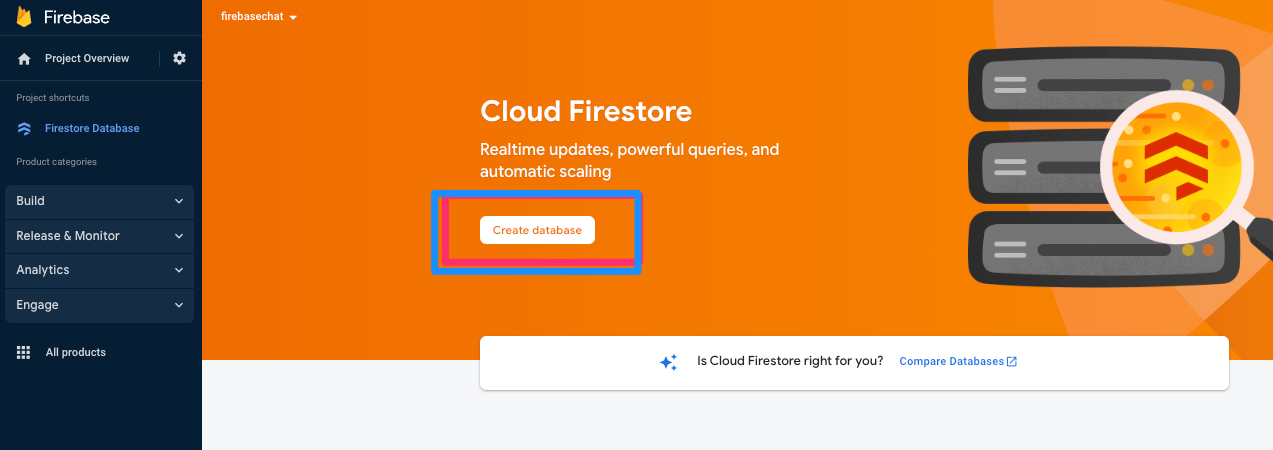
Create Cloud Firestore
Select the "Start in production mode" option, and we will manually configure the ACL to suit our chat.
💡 New to DeadSimpleChat? It's a turnkey chat that you can easily add to your website or App —without any complicated code. For Virtual / Live events, SaaS App, Social Platform, Education, Gaming, and Finance Sign Up for Free
Step 3: Allowing Anonymous Authentication
For our chat we want the users to simply type in a username and join the chat, for that we would need "Anonymous" authentication.
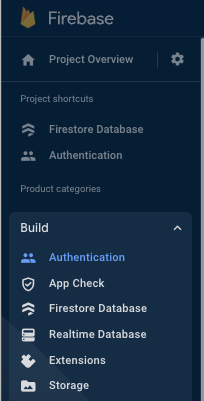
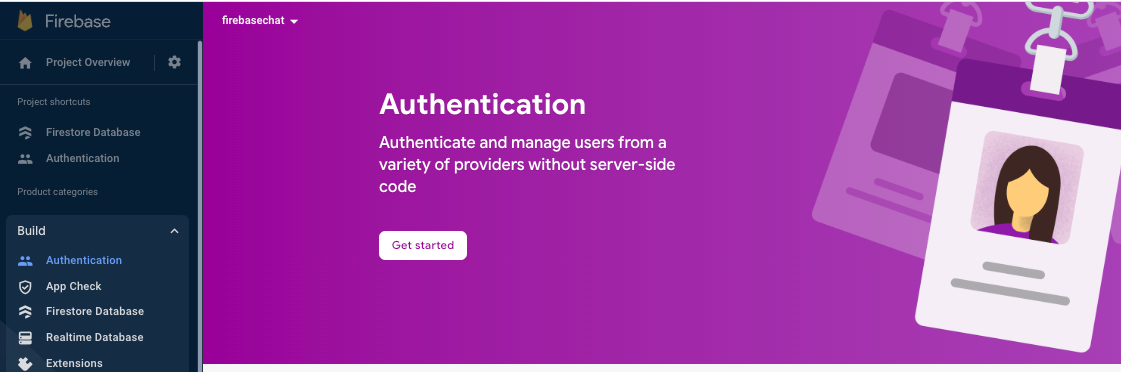
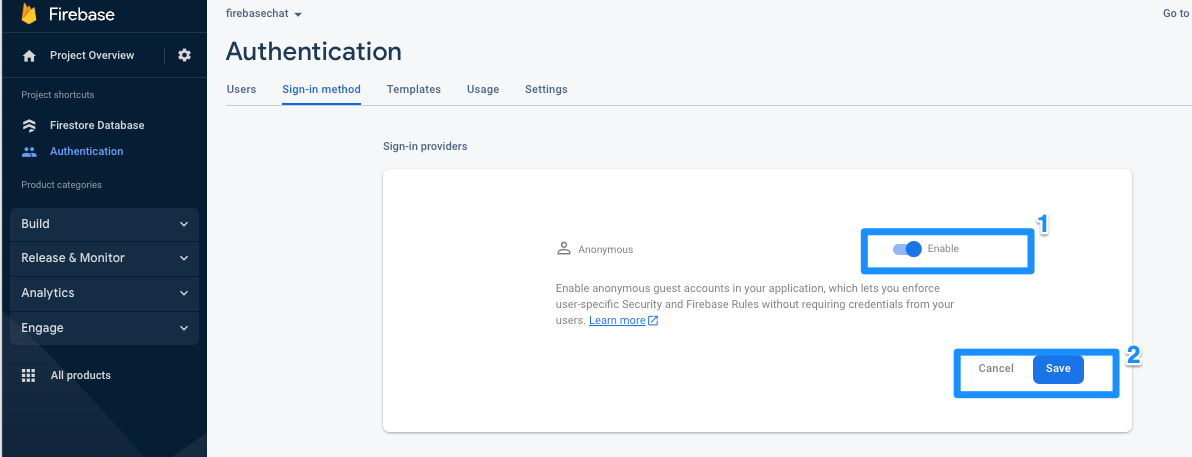
To enable that we will select the "Authentication" option from the sidebar
Click the "Get Started" button from the Authentication page
Authentication google firebase
Now select the "Anonymous" option
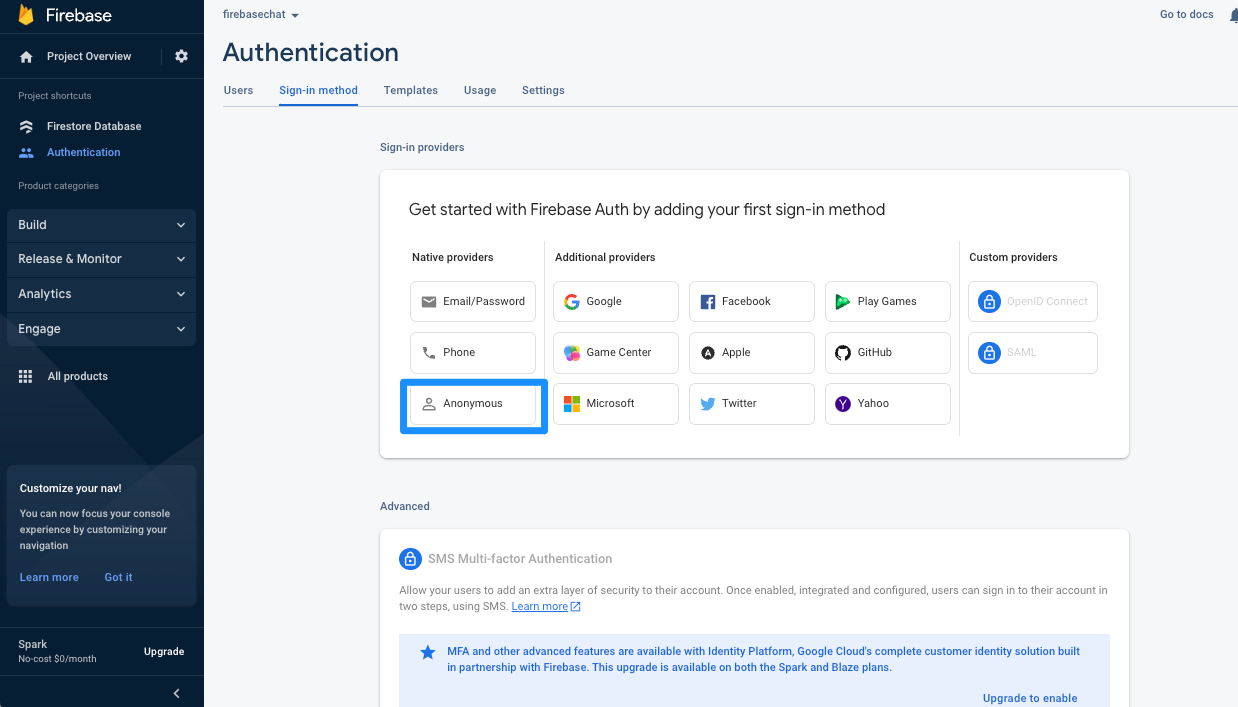
And Enable it and save
Now Go back to "Firestore Database" and select "Rules" and update the existing rule to the following:
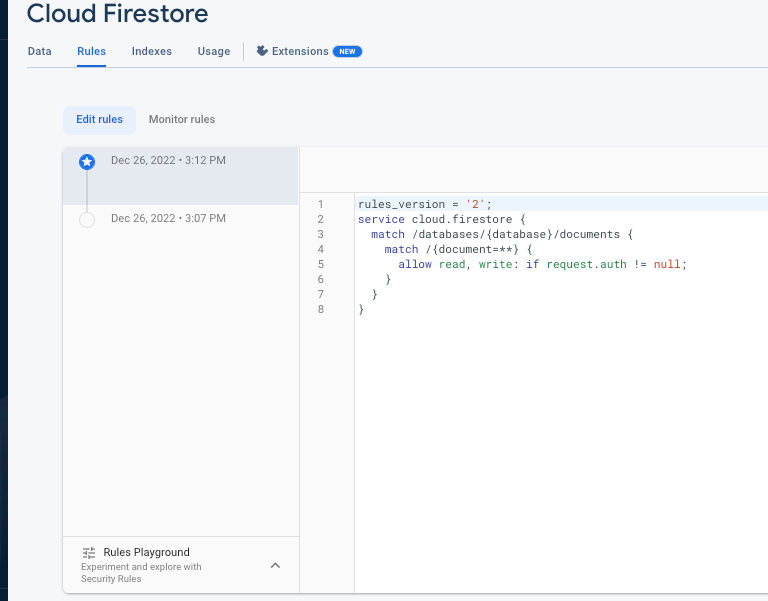
rules_version = '2';
service cloud.firestore {
  match /databases/{database}/documents {
    match /{document=**} {
      allow read, write: if request.auth != null;
    }
  }
}
This will allow the authenticated users to read and write to the firebase database.
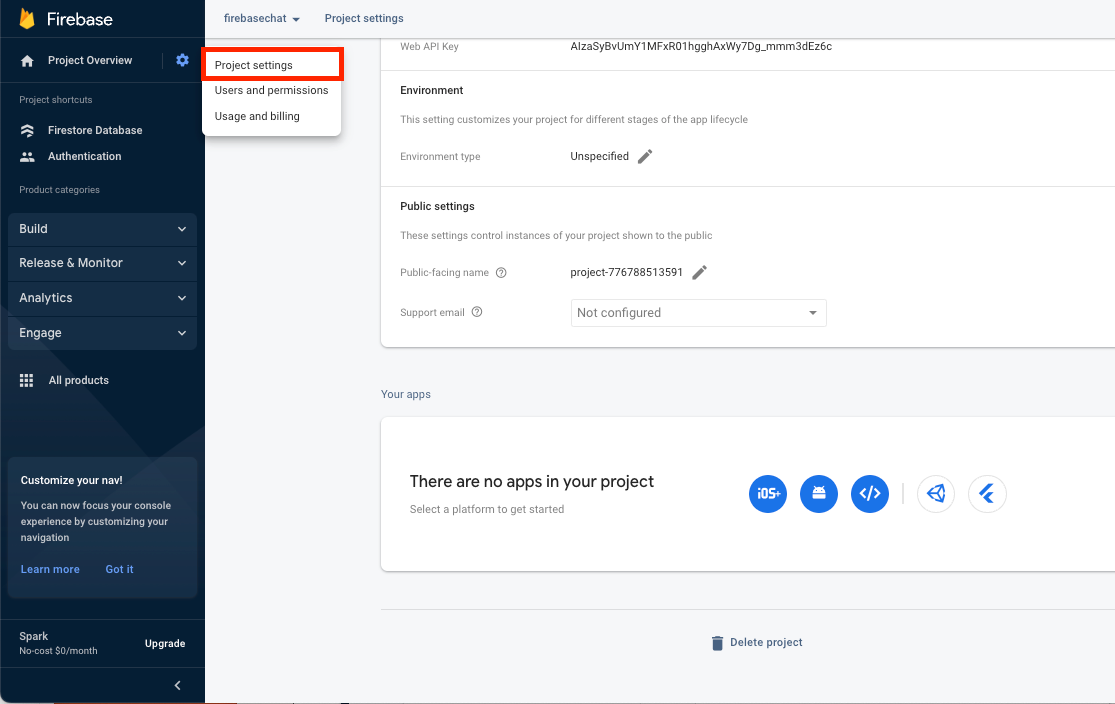
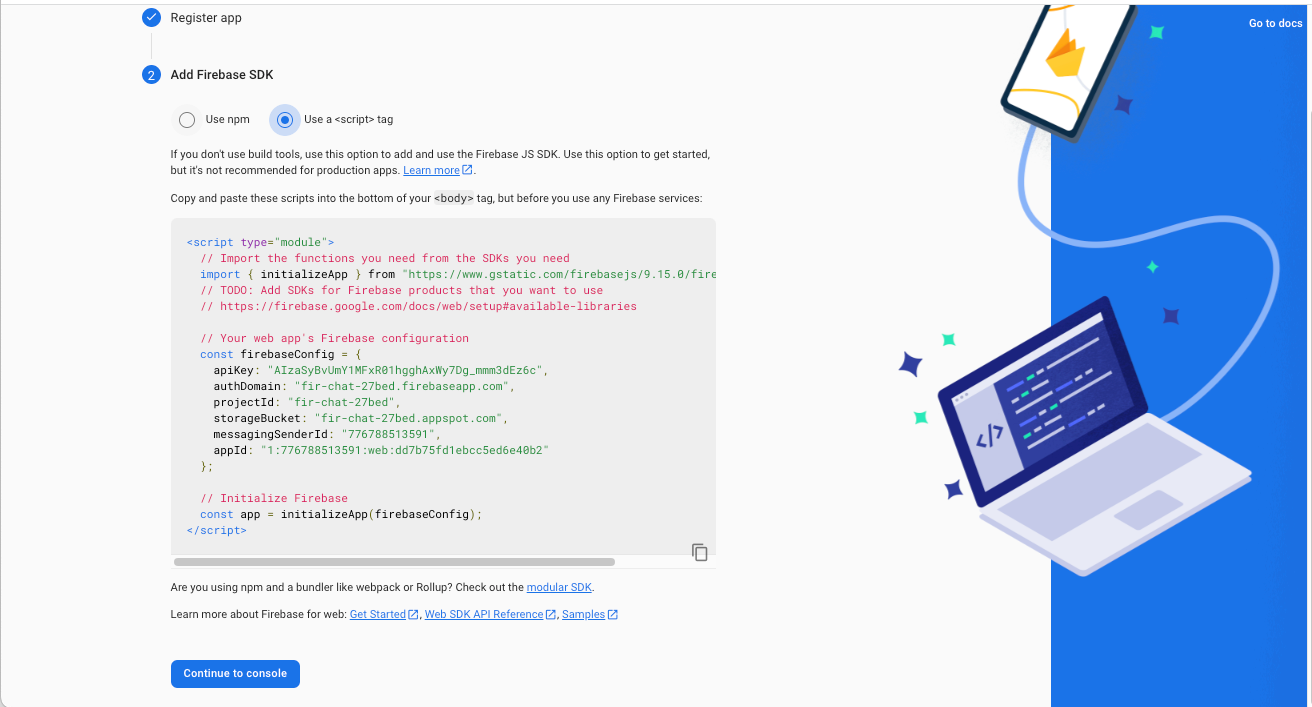
Step 4: Obtaining Firebase Config
The firebase config is required to connect our chat app to the firebase server. Tie obtain the config go to project settings
Click the icon to generate the credentials for the web app
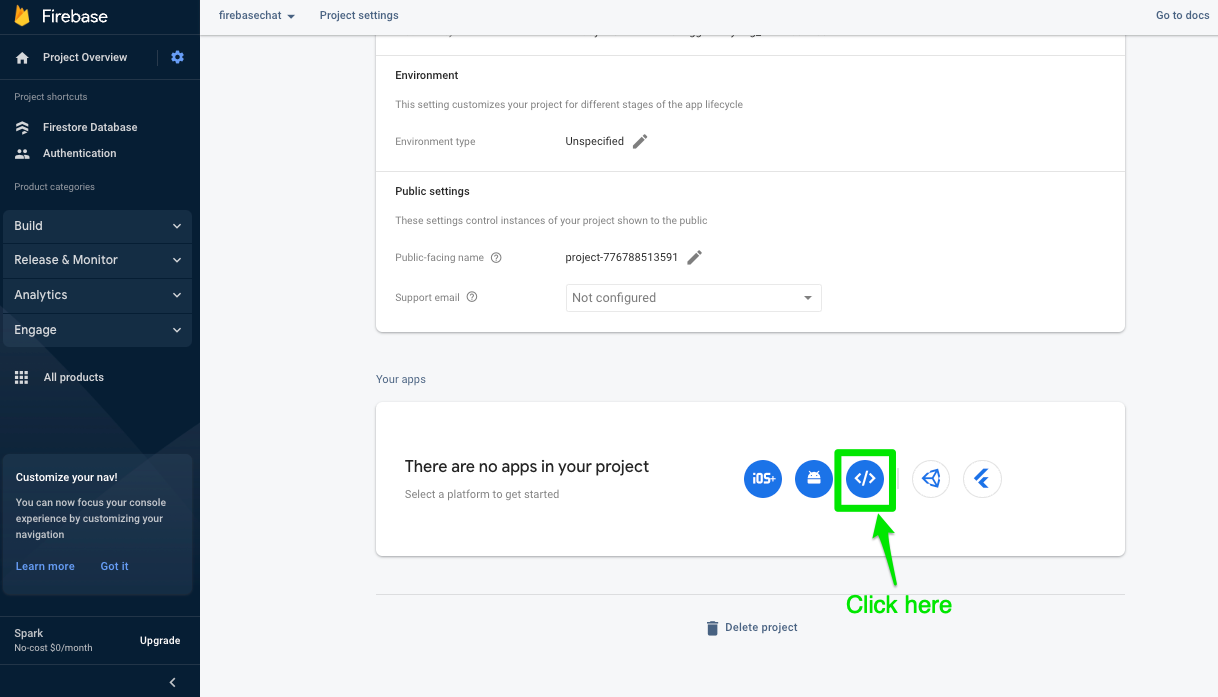
Name the app to whatever you like
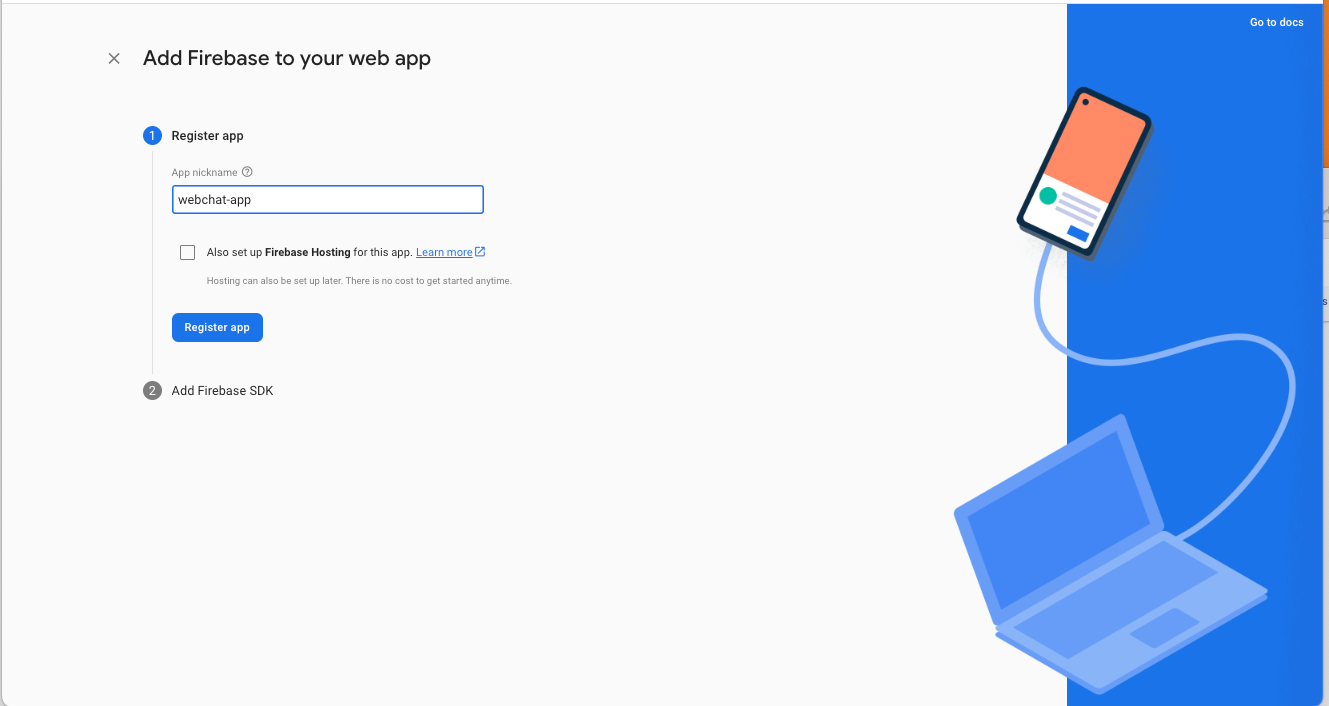
Select use "<script>" tag and copy the config.
These are all the steps required to setup the firebase project, now let's start building our actual chat application.
Step 4: Scaffolding the Initial Chat UI
In our chat application, we would require an interface that would allow the user to enter his/her username.
And we would require the main chat UI, where all the messages will be displayed and an input area that allows the user to send new messages.
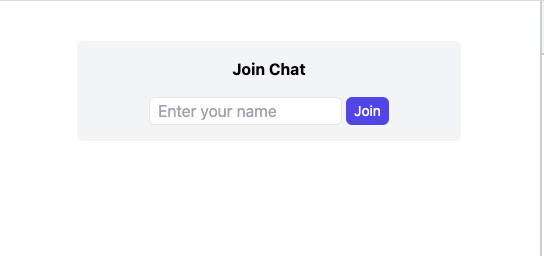
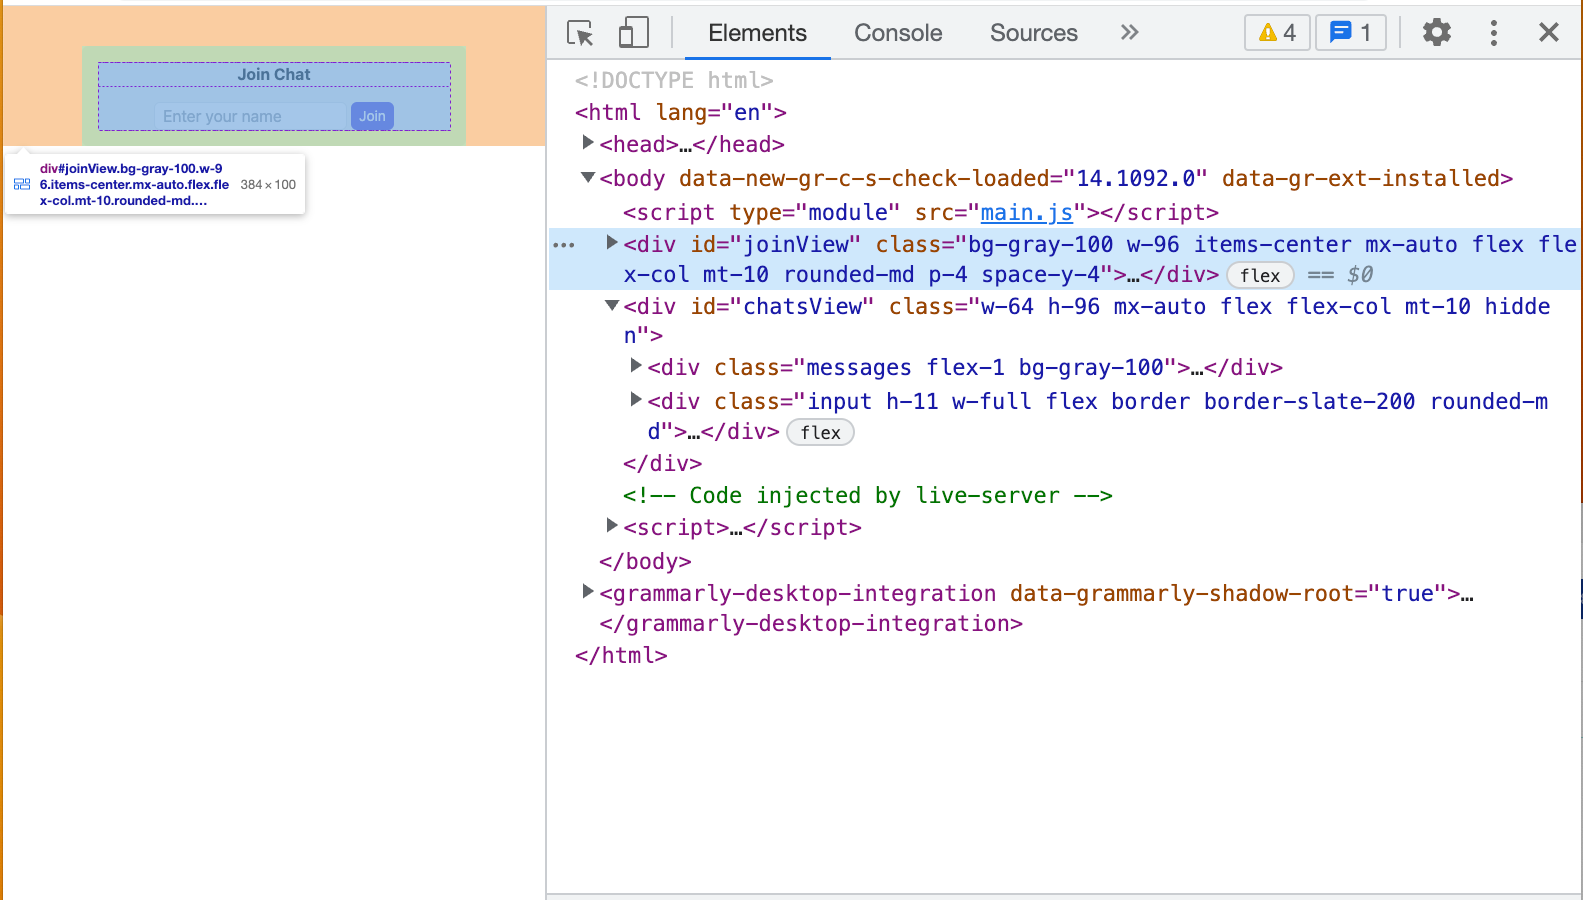
Join Chat UI
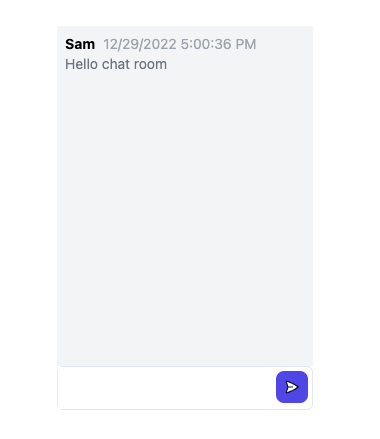
Chat UI
<!DOCTYPE html>
<html lang="en">
  <head>
    <meta charset="UTF-8" />
    <meta http-equiv="X-UA-Compatible" content="IE=edge" />
    <meta name="viewport" content="width=device-width, initial-scale=1.0" />
    <title>Firebase Chat</title>
    <script src="https://cdn.tailwindcss.com"></script>
  </head>
  <body>
    <script type="module" src="main.js"></script>

    <div
      id="joinView"
      class="bg-gray-100 w-96 items-center mx-auto flex flex-col mt-10 rounded-md p-4 space-y-4"
    >
      <h1 class="text-center font-bold">Join Chat</h1>
      <div class="flex space-x-1">
        <input
          id="usernameInput"
          type="text"
          class="bg-white border border-gray-200 rounded-md px-2"
          placeholder="Enter your name"
        />
        <button
          id="joinButton"
          class="bg-indigo-600 px-2 py-1 text-sm text-white rounded-md"
        >
          Join
        </button>
      </div>
    </div>

    <div id="chatsView" class="w-64 h-96 mx-auto flex flex-col mt-10 hidden">
      <div class="messages flex-1 bg-gray-100">
        <ul id="messageList">
          <li>
            <div class="flex space-x-2 pl-2 pt-2">
              <div class="flex flex-col">
                <div class="flex items-baseline space-x-2">
                  <div class="text-sm font-bold">Tommy Lee</div>
                  <div class="text-sm text-gray-400">5:20 pm</div>
                </div>
                <div class="text-sm text-gray-500">Hello world</div>
              </div>
            </div>
          </li>

          <li>
            <div class="flex space-x-2 pl-2 pt-2">
              <div class="flex flex-col">
                <div class="flex items-baseline space-x-2">
                  <div class="text-sm font-bold">Tommy Lee</div>
                  <div class="text-sm text-gray-400">5:21 pm</div>
                </div>
                <div class="text-sm text-gray-500">Testing</div>
              </div>
            </div>
          </li>

          <li>
            <div class="flex space-x-2 pl-2 pt-2">
              <div class="flex flex-col">
                <div class="flex items-baseline space-x-2">
                  <div class="text-sm font-bold">James Bond</div>
                  <div class="text-sm text-gray-400">5:21 pm</div>
                </div>
                <div class="text-sm text-gray-500">Good Job</div>
              </div>
            </div>
          </li>
        </ul>
      </div>
      <div class="input h-11 w-full flex border border-slate-200 rounded-md">
        <input id="messageInput" type="text" class="outline-none flex-1 px-1" />
        <div class="p-1">
          <button id="sendButton" class="bg-indigo-600 p-2 rounded-lg">
            <svg
              xmlns="http://www.w3.org/2000/svg"
              fill="white"
              viewBox="0 0 24 24"
              stroke-width="1.5"
              stroke="black"
              class="w-4 h-4"
            >
              <path
                stroke-linecap="round"
                stroke-linejoin="round"
                d="M6 12L3.269 3.126A59.768 59.768 0 0121.485 12 59.77 59.77 0 013.27 20.876L5.999 12zm0 0h7.5"
              />
            </svg>
          </button>
        </div>
      </div>
    </div>
  </body>
</html>
We will use Tailwind CSS to style the user interface, the above code contains our basic UI.
We gave the id joinView to the container that contains the text field to enter the username and the join button.
We give the id chatsViews to the main chat room container
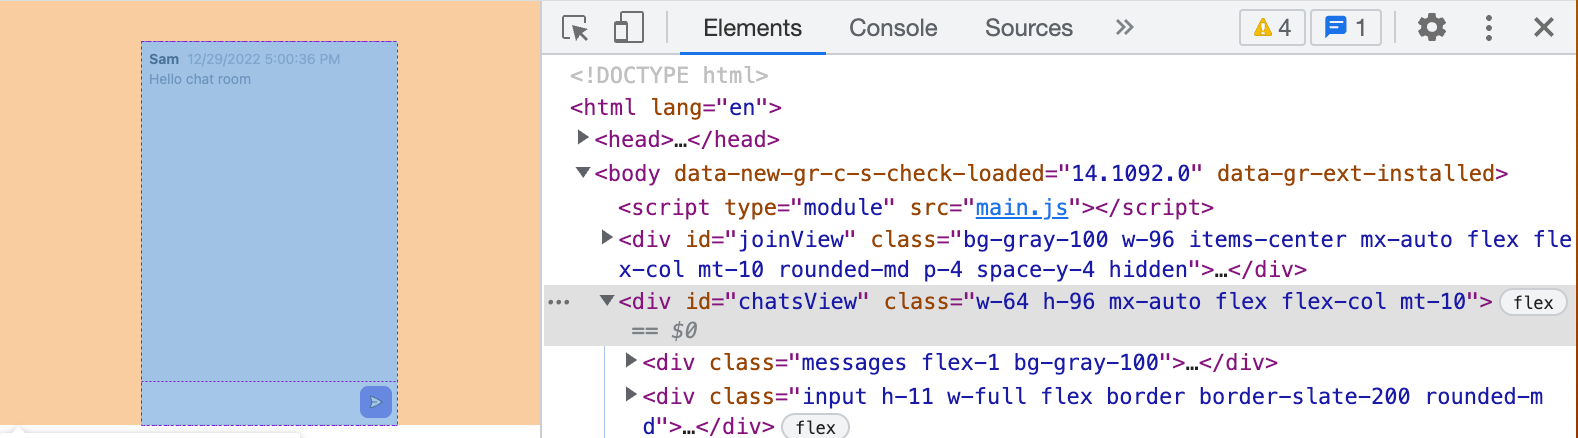
When the user has not joined the chat room, we will hide the chatsView container and when the user has joined the chat room we will hide the joinView container and show the chatsView container.
We also created a ul tag and gave it the id messageList this will contain all the messages that are sent in the chat room.

We will redraw this list each time a new message is sent to the chat room.
Step 5: Wiring up the UI
Now let's wire up the UI using JavaScript and Firebase SDK, create the main.js
Import the Firebase SDK
import { initializeApp } from "https://www.gstatic.com/firebasejs/9.15.0/firebase-app.js";

// Add Firebase products that you want to use
import {
  getAuth,
  signInAnonymously,
} from "https://www.gstatic.com/firebasejs/9.15.0/firebase-auth.js";
import {
  getFirestore,
  addDoc,
  collection,
  onSnapshot,
  doc,
  getDocs,
  query,
  where,
} from "https://www.gstatic.com/firebasejs/9.15.0/firebase-firestore.js";
Paste the firebase config, that you had obtained from Step 3
// Your web app's Firebase configuration
const firebaseConfig = {
  apiKey: "AIzaSyCRa0JplErns226xER0Fpk1cEulP2c6y0Q",
  authDomain: "fir-chat-a082b.firebaseapp.com",
  databaseURL: "https://fir-chat-a082b-default-rtdb.firebaseio.com",
  projectId: "fir-chat-a082b",
  storageBucket: "fir-chat-a082b.appspot.com",
  messagingSenderId: "589407773218",

  appId: "1:589407773218:web:676cf16926d1dee647607b",
};
We will call the Firebase initializeApp method and pass it the firebaseConfig.
const app = initializeApp(firebaseConfig);
Obtain the instance of the Firestore database and Auth. We will use the Firestore database to send messages and receive real-time updates about the messages.
const db = getFirestore(app);

const auth = getAuth(app);
Now we will refer to the HTML elements on our UI to listen to the events and to show and hide the user-interface elements.
const joinButton = document.getElementById("joinButton");
const usernameInput = document.getElementById("usernameInput");
const messageInput = document.getElementById("messageInput");
const sendButton = document.getElementById("sendButton");
const joinView = document.getElementById("joinView");
const chatsView = document.getElementById("chatsView");
Handling Join
We will add the click event listener to the "Join" button. When the join button is clicked we will check if there is any value in the usernameInput field.
If the user has typed a username in the usernameInput field then we will call the signInAnonymously method of the Firebase SDK, to sign in the user into the chat room.
Without calling this method, we cannot read from or write to the Firestore database.
Once the sign-in is successful we will hide the joinView and show the chatsView.
let specifiedUsername = "";
let userLoggedIn = false;
joinButton.addEventListener("click", () => {
  specifiedUsername = usernameInput.value;
  if (!specifiedUsername) {
    alert("username cannot be empty");
    return;
  }

  signInAnonymously(auth)
    .then(async () => {
      joinView.classList.add("hidden");
      chatsView.classList.remove("hidden");
      userLoggedIn = true;
      await loadHistoricalMessages();
      await subscribeToNewMessages();
      writeMessagesArray();
      console.log("User logged-in");
    })
    .catch((error) => {
      const errorCode = error.code;
      const errorMessage = error.message;

      console.log(errorCode, errorMessage);
    });
});
Loading Previous Messages
In the previous code snippet, we logged the user into the chat room.
And as you can see in the code snippet, we are also calling the method loadHistoricalMessages() so we will implement that method in this section.
In the loadHistoricalMessages() the method we will query the Firestore database to fetch all the previous messages, and we will store them in a global messages array.
To fetch the historical messages we will call the getDocs method:
async function loadHistoricalMessages() {
  messages = [];
  const querySnapshot = await getDocs(collection(db, "messages"));
  querySnapshot.forEach((doc) => {
    messages.push({
      id: doc.id,
      ...doc.data(),
    });
  });
  console.log(messages);
  return messages;
}
Listening to New Messages
To listen to the new messages, we will call the onSnapshot method of the Firestore SDK.
The onSnapShot method takes in a query, as we want to listen to the complete collection we will not specify any condition in the query.
This will cause the method to trigger each time a new message is sent in the chat room.
And when onSnapShot method is triggered, we will push the new messages to our global messages array.
But the onSnapShot method returns not just the new message, but also some previous messages along with the new message.
We don't want to push the other messages into the array, we just want to push the new message, because it would result in duplicate messages being shown in the chat room.
To prevent that we will create a hash map of the id of all the existing messages, and then loop through the newMessages and we will not push messages whose id matches the existing messages.
function subscribeToNewMessages() {
  const q = query(collection(db, "messages"));
  const unsubscribe = onSnapshot(q, (querySnapshot) => {
    const newMessages = [];
    querySnapshot.forEach((doc) => {
      newMessages.push({
        id: doc.id,
        ...doc.data(),
      });
    });

    /**
     * Creating hash map of the existing messages.
     */
    let existingMessageHash = {};
    for (let message of messages) {
      existingMessageHash[message.id] = true;
    }

    /**
     * Push only those messages which do not
     * exist in the hashMap
     */
    for (let message of newMessages) {
      if (!existingMessageHash[message.id]) {
        messages.push(message);
      }
    }

    writeMessagesArray();
  });
}
We have created a hashMap of message ID to prevent creating a nested for loop.
Displaying the Messages in the UI
We have been calling the writeMessagesArray() method in the signInAnonymously method and also in the subscribeToNewMessages listener.
The writeMessagesArray() method will display the messages in the messages array in our chat UI.
function writeMessagesArray() {
  const html = [];
  for (let message of messages) {
    html.push(messageTemplate(message.message, message.user, message.created));
  }
  document.getElementById("messageList").innerHTML = html.join("");
}

function messageTemplate(message, username, timestamp) {
  return `<li>
    <div class="flex space-x-2 pl-2 pt-2">
      <div class="flex flex-col">
        <div class="flex items-baseline space-x-2">
          <div class="text-sm font-bold">${username}</div>
          <div class="text-sm text-gray-400">${
            new Date(timestamp.seconds * 1000).toLocaleDateString() +
            " " +
            new Date(timestamp.seconds * 1000).toLocaleTimeString()
          }</div>
        </div>
        <div class="text-sm text-gray-500">${message}</div>
      </div>
    </div>
  </li>`;
}
The method goes through each message in the messages array and calls the messageTemplate method.
The messageTemplate methods contains the HTML code to display the message, and it accepts the username, message, and timestamp and returns the html for the message.
We push the HTML into an array and the adds the HTML to the messageList ul tag.
Sending the messages
So far we have gone through the process of joining the chat room, loading historical messages, listening to new messages and drawing the messages on screen.
Now let's implement the part of actually sending a message.
To send the message, we will add a click listener to the sendButton. When the sendButton is clicked we will call the addDoc method of the Firestore database and store the message in the Firestore database.
Our message model will contain the following properties:
user- username of the usermessage- the actual messagescreated- timestamp when the message was created
sendButton.addEventListener("click", async () => {
  const message = messageInput.value;
  messageInput.value = "";

  const docRef = await addDoc(collection(db, "messages"), {
    user: specifiedUsername,
    message: message,
    created: new Date(),
  });
  console.log(docRef);
});
Here is the complete code of the main.js file altogether.
import { initializeApp } from "https://www.gstatic.com/firebasejs/9.15.0/firebase-app.js";

// Add Firebase products that you want to use
import {
  getAuth,
  signInAnonymously,
} from "https://www.gstatic.com/firebasejs/9.15.0/firebase-auth.js";
import {
  getFirestore,
  addDoc,
  collection,
  onSnapshot,
  doc,
  getDocs,
  query,
  where,
} from "https://www.gstatic.com/firebasejs/9.15.0/firebase-firestore.js";

// Your web app's Firebase configuration
const firebaseConfig = {
  apiKey: "AIzaSyCRa0JplErns226xER0Fpk1cEulP2c6y0Q",
  authDomain: "fir-chat-a082b.firebaseapp.com",
  databaseURL: "https://fir-chat-a082b-default-rtdb.firebaseio.com",
  projectId: "fir-chat-a082b",
  storageBucket: "fir-chat-a082b.appspot.com",
  messagingSenderId: "589407773218",

  appId: "1:589407773218:web:676cf16926d1dee647607b",
};

// Initialize Firebase
const app = initializeApp(firebaseConfig);

const db = getFirestore(app);

const auth = getAuth(app);

const joinButton = document.getElementById("joinButton");
const usernameInput = document.getElementById("usernameInput");
const messageInput = document.getElementById("messageInput");
const sendButton = document.getElementById("sendButton");
const joinView = document.getElementById("joinView");
const chatsView = document.getElementById("chatsView");
let messages = [];

let specifiedUsername = "";
let userLoggedIn = false;
joinButton.addEventListener("click", () => {
  specifiedUsername = usernameInput.value;
  if (!specifiedUsername) {
    alert("username cannot be empty");
    return;
  }

  signInAnonymously(auth)
    .then(async () => {
      joinView.classList.add("hidden");
      chatsView.classList.remove("hidden");
      userLoggedIn = true;
      await loadHistoricalMessages();
      await subscribeToNewMessages();
      writeMessagesArray();
      console.log("User logged-in");
    })
    .catch((error) => {
      const errorCode = error.code;
      const errorMessage = error.message;

      console.log(errorCode, errorMessage);
    });
});

sendButton.addEventListener("click", async () => {
  const message = messageInput.value;
  messageInput.value = "";

  const docRef = await addDoc(collection(db, "messages"), {
    user: specifiedUsername,
    message: message,
    created: new Date(),
  });
  console.log(docRef);
});

function subscribeToNewMessages() {
  const q = query(collection(db, "messages"));
  const unsubscribe = onSnapshot(q, (querySnapshot) => {
    const newMessages = [];
    querySnapshot.forEach((doc) => {
      newMessages.push({
        id: doc.id,
        ...doc.data(),
      });
    });

    /**
     * Creating hash map of the existing messages.
     */
    let existingMessageHash = {};
    for (let message of messages) {
      existingMessageHash[message.id] = true;
    }

    /**
     * Push only those messages which do not
     * exist in the hashMap
     */
    for (let message of newMessages) {
      if (!existingMessageHash[message.id]) {
        messages.push(message);
      }
    }

    writeMessagesArray();
  });
}

async function loadHistoricalMessages() {
  messages = [];
  const querySnapshot = await getDocs(collection(db, "messages"));
  querySnapshot.forEach((doc) => {
    messages.push({
      id: doc.id,
      ...doc.data(),
    });
  });
  console.log(messages);
  return messages;
}

function writeMessagesArray() {
  const html = [];
  for (let message of messages) {
    html.push(messageTemplate(message.message, message.user, message.created));
  }
  document.getElementById("messageList").innerHTML = html.join("");
}

function messageTemplate(message, username, timestamp) {
  return `<li>
    <div class="flex space-x-2 pl-2 pt-2">
      <div class="flex flex-col">
        <div class="flex items-baseline space-x-2">
          <div class="text-sm font-bold">${username}</div>
          <div class="text-sm text-gray-400">${
            new Date(timestamp.seconds * 1000).toLocaleDateString() +
            " " +
            new Date(timestamp.seconds * 1000).toLocaleTimeString()
          }</div>
        </div>
        <div class="text-sm text-gray-500">${message}</div>
      </div>
    </div>
  </li>`;
}
Step 6: That's it
We have built a simple group chat app using Firebase and Firestore database.
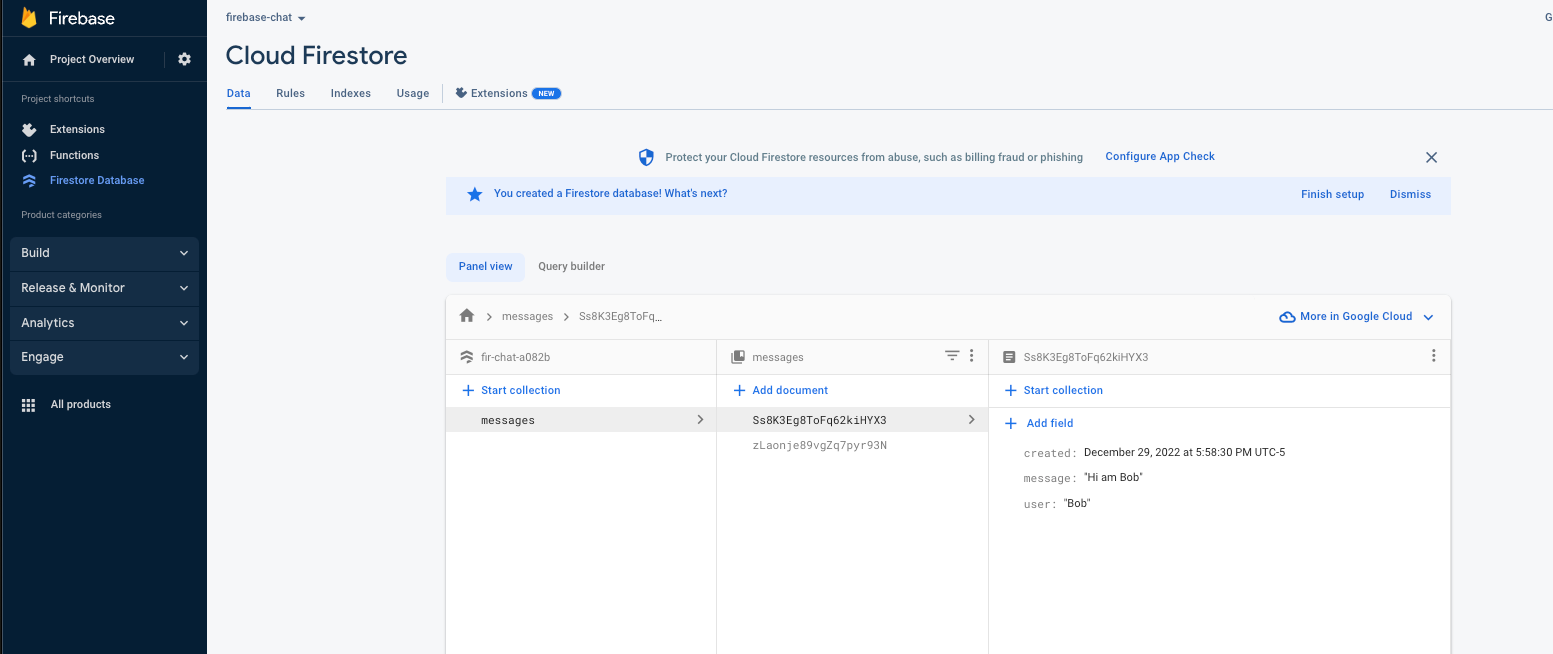
You can go to your Firebase FireStore dashboard and you can see the message sent in the collection.
You can also check out the demo of the Chat Room Below
Add Chat to your Web App with Dead Simple Chat
Dead Simple Chat allows you to easily add prebuilt group chat in minutes to any web or mobile app.
It is highly scalable and can be integrated in minutes. It has Chat SDK, Customization and Moderation features to make the chat fit for any chat use-case, be it Live Streaming, Group Chat or 1-1 Chat.