Build Node.JS Chat App with WebSocket, Node.js Cluster and Redis

Build Node.JS Chat App with WebSocket, Node.js Cluster and Redis

·

20 min read

This article was originally written on the DeadSimpleChat Blog: Build Node.JS Chat App with WebSocket, Node.js Cluster and Redis

Dead Simple Chat offers prebuilt Chat that can be added in seconds to any app or website.

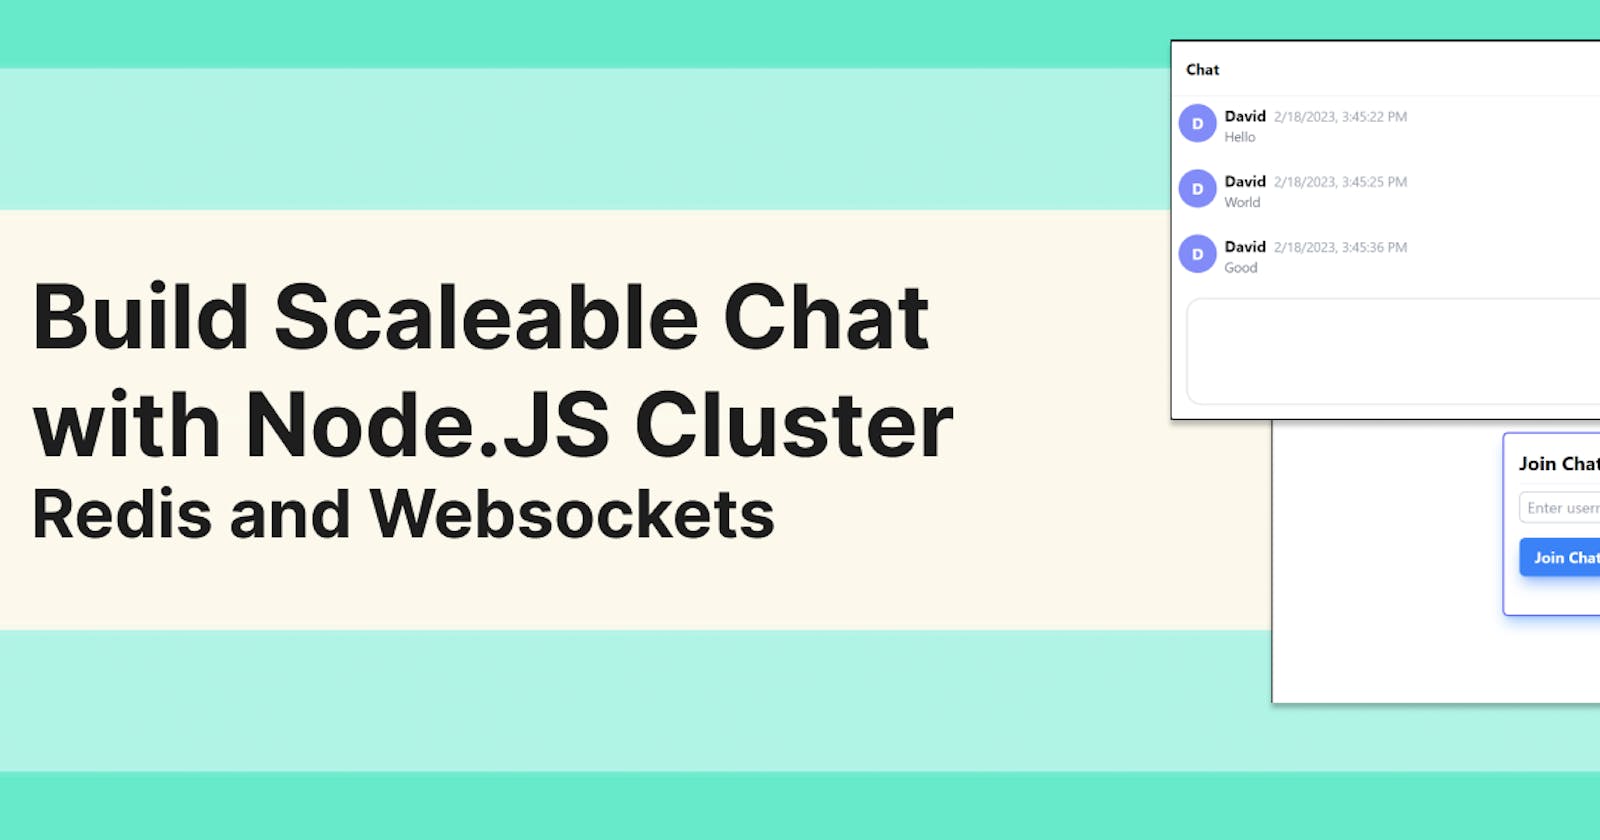
In this blog post, we will build a highly scalable chat application using WebSocket Node.JS and Redis.

This chat application will be high-performance and can handle many concurrent users. Let's get started.

What is Node.JS Cluster?

Node.JS is high-performance javascript runtime, but it is primarily single-threaded.

That means if you have a computer with multiple CPU cores, which all modern computers have your Node.JS application will not be able to leverage all the available CPU cores.

The Node.JS will by default launch a single process that will run on a single CPU core. If you have a 10-core CPU, then the remaining 9 cores will be utilized by your Node.JS program.

The Node.JS cluster module is a built-in Node.JS module and it aims to solve exactly this problem. The cluster module allows you to launch multiple child processes or worker threads that would execute on other CPU cores to fully utilize the multiple cores offered in modern CPUs.

We will use the Node.JS Cluster module to launch multiple threads to handle concurrent connections to our chat server to extract maximum performance.

What are WebSockets?

Websockets allow us to have a real-time connection between the client which is the browser and our backend chat server.

This the client to receive the messages in real time without polling the server, and it allows the server to push the messages to the client.

It creates a bi-directional pipe between the client and the server which will allow us to send and receive the messages.

To handle WebSockets we will use the "Socket.IO" library which offers a nice wrapper around the vanilla WebSockets and provides additional functionality like stick connections which will be much needed in our clustered application.

Why use Redis to store messages?

Redis is a high-performance in-memory data store, and it is super fast. It can handle thousands of operations per second on modest hardware.

Thus using Redis to store messages would add minimal lag to our Chat Message Server.

✴️ You can use Dead Simple Chat as your in-app chat solution, which allows you to add chat highly scaleable chat in minutes.

Step 1: Scaffolding the Application

Let's scaffold the application, we will create a directory named chat-application

mkdir chat-application

Then we will cd into the directory.

cd chat-application

And we will run the command npm init

npm init -y

The npm init command will create a package.json file.

Also, create a folder called as public it will contain our chat front-end.

mkdir public

Step 2: Installing Dependencies

For our chat application, we will install the following packages:

  1. express - Express is a minimal web application framework that will allow us to easily create a web app in Node.JS

  2. ioredis - ioredis is a high-performance redis driver for Node.JS. This will allow us to connect to the redis database from our Node.JS application.

  3. socket.io - socket.io is a WebSocket library that we will be using as it offers built-in sticky connection support for clustering.

  4. @socket.io/sticky and @socket.io/cluster-adapter - These two packages will be used to setup stick connections in the worker threads.

Run the following command to install the above dependencies

npm install express ioredis socket.io @socket.io/cluster-adapter @socket.io/sticky --save

Step 3: Clustering Setup

Create a file called as server.js this will contain all the backend code for our chat server and open the server.js file in your favourite code editor.

Add the following code to the server.js file:

const cluster = require('node:cluster');
const http = require('node:http');
const numCPUs = require('node:os').availableParallelism();
const process = require('node:process');
const { setupMaster, setupWorker } = require("@socket.io/sticky");
const { createAdapter, setupPrimary } = require("@socket.io/cluster-adapter");
const { Server } = require("socket.io");
const { info } = require('node:console');
const express = require("express");

/**
 * Checking if the thread is a worker thread
 * or primary thread.
 */
if (cluster.isPrimary) {
    console.log(`Primary ${process.pid} is running`);

     /**
     * Creating http-server for the master.
     * All the child workers will share the same port (3000)
     */
    const httpServer = http.createServer();
    httpServer.listen(3000);

    // Setting up stick session
    setupMaster(httpServer, {
        loadBalancingMethod: "least-connection"
    });

    // Setting up communication between workers and primary
    setupPrimary();
    cluster.setupPrimary({
        serialization: "advanced"
    });

    // Launching workers based on the number of CPU threads.
    for (let i = 0; i < numCPUs; i++) {
        cluster.fork();
    }

    cluster.on('exit', (worker, code, signal) => {
        console.log(`worker ${worker.process.pid} died`);
      });
} else {
    /**
     * Setting up the worker threads
     */

    console.log(`Worker ${process.pid} started`);

    /**
     * Creating Express App and Socket.io Server
     * and binding them to HTTP Server.
     */
    const app = express();
    const httpServer = http.createServer(app);
    const io = new Server(httpServer);

    // Using the cluster socket.io adapter.
    io.adapter(createAdapter());

    // Setting up worker connection with the primary thread.
    setupWorker(io);

    io.on("connection", (socket) => {
        // Handling socket connections.
        socket.on("message", (data) => {
            console.log(`Message arrived at ${process.pid}`);
        });
    });

    // Handle HTTP Requests
    app.get("/", (req, res) => {
        res.send("Hello world");
    });

In the above code snippet we have created a socket.io and express server that runs on multiple cores.

It checks the number of CPUs available and launches the worker threads equal to the number of CPU threads available.

Step 4: Handling Messages

Each time a new client connects to the chat server the io.on("connection", (socket) => { }); code block executes.

io.on("connection", (socket) => {

});

The socket object allows us to communicate bi-directionally with the client, we can listen to the event emitted by the client and we can also emit events to the client.

    io.on("connection", (socket) => {
        // Handling socket connections.
        socket.on("message", (data) => {
            console.log(`Message arrived at ${process.pid}:`, data);

            socket.emit("message", data);
        });
    });

In the above code block, we are listening to the message event, the name of the event can be anything.

And then we are emitting a message event to the client with some data. Data can be anything, it can be a string or JSON object.

Sending Messages to all the client

The socket.emit event just sends the message to on client, the client the socket object is associated with.

If you want to send messages to all the connected client, then you can use the method io.broadcast.emit("event", message)

The io.broadcast.emit method will send the message to all the connected clients.

If you want to send the message to all clients except the current socket instance, then you can use the method socket.broadcast.emit("event", message);

Build a basic chat message server

A very basic chat message server would be a chat message server that sends a message to all connected clients when it receives a new message.

The code for that will look this:

io.on("connection", (socket) => {
    // Handling socket connections.
    socket.on("message", (data) => {
        console.log(`Message arrived at ${process.pid}:`, data);

        io.broadcast.emit("message", data);
    });
});

We will certainly improve this, by adding validation to the messages, sanitizing the messages and storing them in our Redis database, but apart from that the design of the chat message server is almost complete.

With just a few lines of code, we have built a highly scaleable chat server. Now let's build the front-end and then after that, we will come back to adding persistent storage for the messages.

Step 5: Building the Front-end

Remember we had created a public folder. We will tell express to serve all the files in the public folder as static assets. To do that we will add the following line of code.

app.use(express.static('public'))

Then in the public folder create a file called index.html

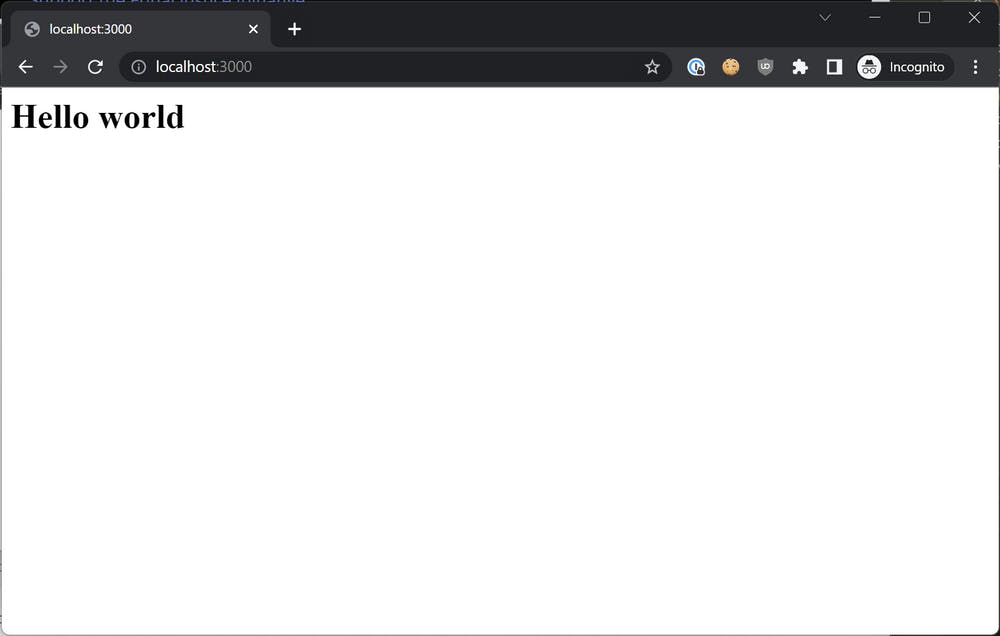
In the public/index.html file add the following code:

<h1>Hello world</h1>

Now start the server and go to http://localhost:3000 and you will a page with "Hello world" text.

We will build our front-end inside the public folder. In the public folder create two more folders one is js and css.

The js folder will contain the JavaScript code for the front-end and css folder will contain the CSS.

Scaffolding the Front-End

We will delete everything from the index.html file and create a basic HTML structure and import some dependencies like the socket.io client to connect to our websocket server and TailwindCSS for styling.

<!DOCTYPE html>
<html lang="en">
<head>
    <meta charset="UTF-8">
    <meta http-equiv="X-UA-Compatible" content="IE=edge">
    <meta name="viewport" content="width=device-width, initial-scale=1.0">
    <title>Chat</title>

    <link href="https://cdn.jsdelivr.net/npm/daisyui@2.50.1/dist/full.css" rel="stylesheet" type="text/css" />
    <script src="https://cdn.tailwindcss.com"></script>
    <script src="/socket.io/socket.io.js"></script>

</head>
<body>


    <script src="/js/main.js"></script>
</body>
</html>

Step 6: Building the Chat UI

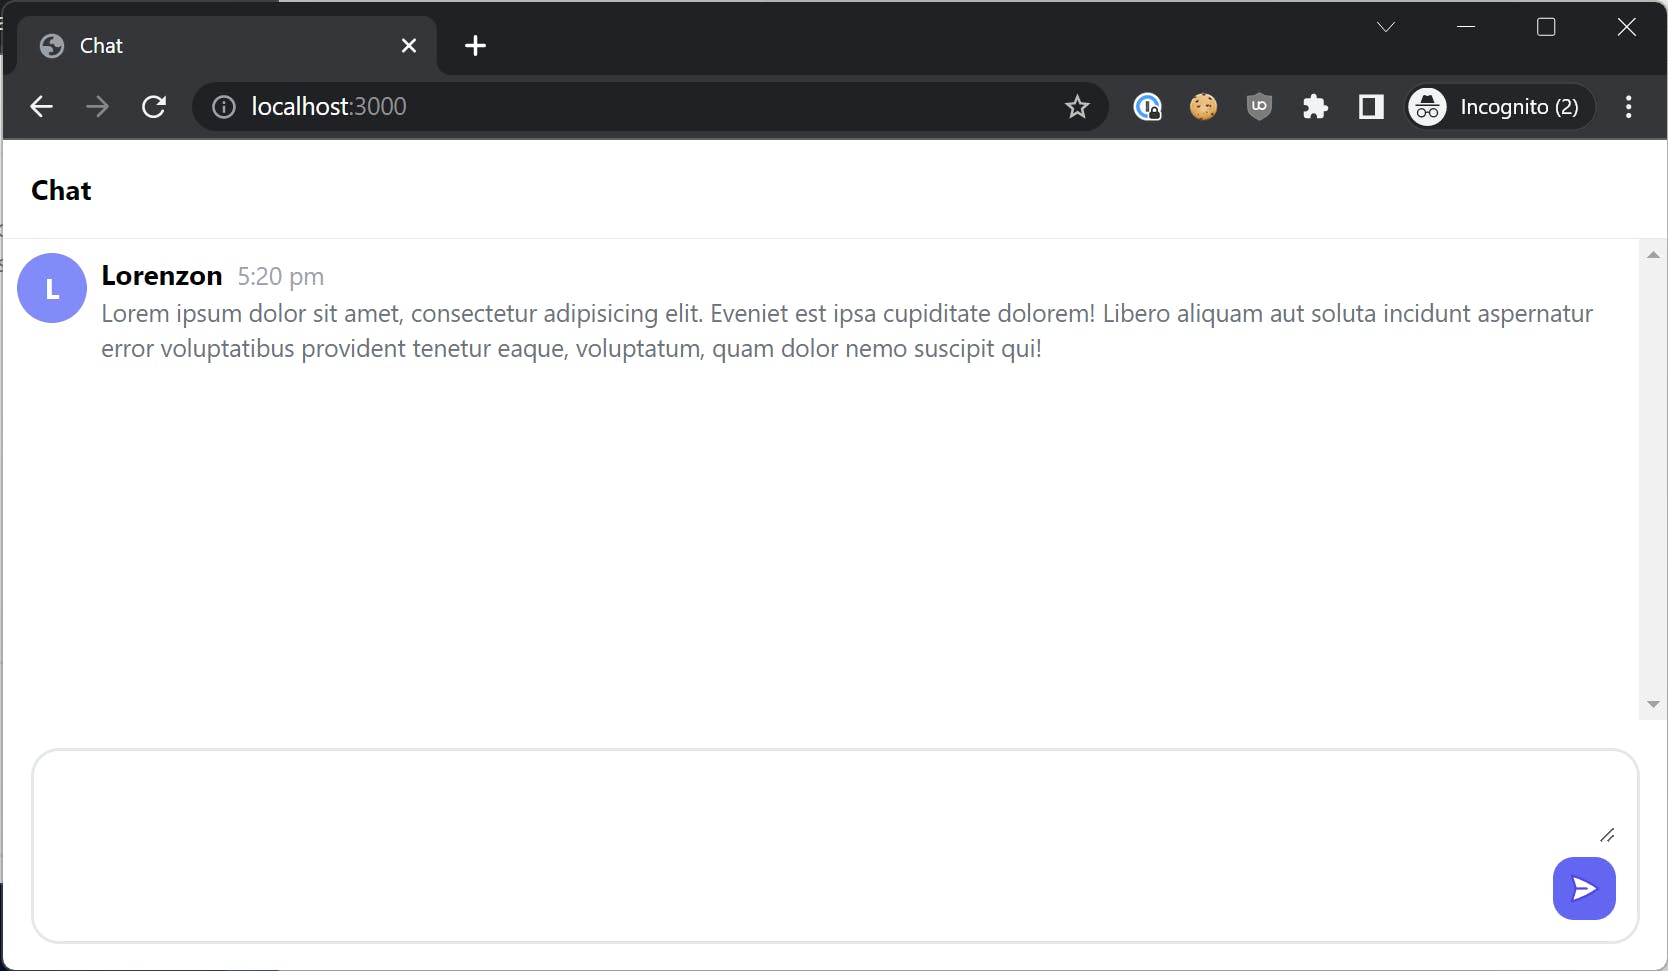
Now once the front end is scaffolded let's build the front-end chat UI, we will design basic chat UI using TailwindCSS and our final code looks something like this:

<!DOCTYPE html>
<html lang="en" data-theme="business">
<head>
    <meta charset="UTF-8">
    <meta http-equiv="X-UA-Compatible" content="IE=edge">
    <meta name="viewport" content="width=device-width, initial-scale=1.0">
    <title>Chat</title>

    <script src="https://cdn.tailwindcss.com"></script>
    <script src="/socket.io/socket.io.js"></script>

</head>
<body>

    <div class="grid h-screen">

        <div class="flex max-h-screen flex-col">
          <div class="header text-md border-b border-gray-200 py-4 pl-4 font-bold">Chat</div>
          <div class="chat-messages flex-1 overflow-y-scroll">
            <ul class="space-y-4">
              <li>
                <div class="flex space-x-2 pl-2 pt-2">
                  <div class="flex-shrink-0">
                    <div class="h-10 w-10 rounded-full bg-indigo-400 flex items-center justify-center font-bold text-white">L</div>
                  </div>
                  <div class="flex flex-col">
                    <div class="flex items-baseline space-x-2">
                      <div class="font-bold">Lorenzon</div>
                      <div class="text-sm text-gray-400">5:20 pm</div>
                    </div>

                    <div class="text-sm text-gray-500">Lorem ipsum dolor sit amet, consectetur adipisicing elit. Eveniet est ipsa cupiditate dolorem! Libero aliquam aut soluta incidunt aspernatur error voluptatibus provident tenetur eaque, voluptatum, quam dolor nemo suscipit qui!</div>
                  </div>
                </div>
              </li>

            </ul>
          </div>
          <div class="input-container p-4">
            <div class="input-area flex h-28 w-full flex-col space-y-2 rounded-2xl border-2 border-gray-200 p-3">
              <textarea class="w-full flex-1 outline-none"></textarea>
              <div class="buttons flex flex-row items-center space-x-2 align-baseline">
                <div class="flex-1">
                </div>
                <div>
                  <button class="float-right rounded-xl bg-indigo-500 p-2">
                    <svg xmlns="http://www.w3.org/2000/svg" fill="white" viewBox="0 0 24 24" stroke-width="1.5" stroke="currentColor" class="h-5 w-5 text-indigo-600">
                      <path stroke-linecap="round" stroke-linejoin="round" d="M6 12L3.269 3.126A59.768 59.768 0 0121.485 12 59.77 59.77 0 013.27 20.876L5.999 12zm0 0h7.5" />
                    </svg>
                  </button>
                </div>
              </div>
            </div>
          </div>
        </div>
      </div>


    <script src="/js/main.js"></script>
</body>
</html><!DOCTYPE html>
<html lang="en" data-theme="business">
<head>
    <meta charset="UTF-8">
    <meta http-equiv="X-UA-Compatible" content="IE=edge">
    <meta name="viewport" content="width=device-width, initial-scale=1.0">
    <title>Chat</title>

    <script src="https://cdn.tailwindcss.com"></script>
    <script src="/socket.io/socket.io.js"></script>

</head>
<body>

    <div class="grid h-screen">

        <div class="flex max-h-screen flex-col">
          <div class="header text-md border-b border-gray-200 py-4 pl-4 font-bold">Chat</div>
          <div class="chat-messages flex-1 overflow-y-scroll">
            <ul class="space-y-4">
              <li>
                <div class="flex space-x-2 pl-2 pt-2">
                  <div class="flex-shrink-0">
                    <div class="h-10 w-10 rounded-full bg-indigo-400 flex items-center justify-center font-bold text-white">L</div>
                  </div>
                  <div class="flex flex-col">
                    <div class="flex items-baseline space-x-2">
                      <div class="font-bold">Lorenzon</div>
                      <div class="text-sm text-gray-400">5:20 pm</div>
                    </div>

                    <div class="text-sm text-gray-500">Lorem ipsum dolor sit amet, consectetur adipisicing elit. Eveniet est ipsa cupiditate dolorem! Libero aliquam aut soluta incidunt aspernatur error voluptatibus provident tenetur eaque, voluptatum, quam dolor nemo suscipit qui!</div>
                  </div>
                </div>
              </li>

            </ul>
          </div>
          <div class="input-container p-4">
            <div class="input-area flex h-28 w-full flex-col space-y-2 rounded-2xl border-2 border-gray-200 p-3">
              <textarea class="w-full flex-1 outline-none"></textarea>
              <div class="buttons flex flex-row items-center space-x-2 align-baseline">
                <div class="flex-1">
                </div>
                <div>
                  <button class="float-right rounded-xl bg-indigo-500 p-2">
                    <svg xmlns="http://www.w3.org/2000/svg" fill="white" viewBox="0 0 24 24" stroke-width="1.5" stroke="currentColor" class="h-5 w-5 text-indigo-600">
                      <path stroke-linecap="round" stroke-linejoin="round" d="M6 12L3.269 3.126A59.768 59.768 0 0121.485 12 59.77 59.77 0 013.27 20.876L5.999 12zm0 0h7.5" />
                    </svg>
                  </button>
                </div>
              </div>
            </div>
          </div>
        </div>
      </div>


    <script src="/js/main.js"></script>
</body>
</html>

And the Chat UI will look like this:

Wiring up the UI

Adding IDs to connect to the UI elements

  • We will update the HTML and id chat-messages to the ul tag that store the messages.

  • Add id message to the textarea element that will contain the typed message

  • Add id send-message to the send button

    And we will remove the placeholder message from the html, and our index.html file will look like this:

  • ```xml <!DOCTYPE html>

    Chat

    Chat

``` **Connecting to the UI elements** Now we will connect the UI elements to our JavaScript code, open `main.js` file and add the following code: ```javascript const socket = io(); socket.on("message", function(data) { const html = generateMessageHTML(data.username, data.timestamp, data.message); const element = document.createElement("li"); element.innerHTML = html; document.getElementById("chat-messages").appendChild(element); }); document.getElementById("send-message").addEventListener("click", function() { const message = document.getElementById("message").value; socket.emit("message", { username: "david", message: message, timestamp: new Date() }); document.getElementById("message").value = ""; }); ``` Let's go through above code, in the first line we are connecting to our WebSocket server. ```javascript const socket = io(); ``` Then we are listening for a message event, and when the message event arrives are calling the method `generateMessageHTML` method, and we will build that method in the next section. ```javascript socket.on("message", function(data) { const html = generateMessageHTML(data.username, data.timestamp, data.message); const element = document.createElement("li"); element.innerHTML = html; document.getElementById("chat-messages").appendChild(element); }); ``` The `generateMessageHTML` method returns the HTML for the message that we can append to the page. Then we are creating an `li` tag and adding the HTML to the `li` tag, and appending the `li` tag to `chat-messages`. Next, we are listening to the click event on the `send-message` button. ```javascript document.getElementById("send-message").addEventListener("click", function() { const message = document.getElementById("message").value; socket.emit("message", { username: "david", message: message, timestamp: new Date() }); document.getElementById("message").value = ""; }); ``` When the button is clicked we are emitting a `message` event, that contains our chat message object. The chat message object has the following properties: ```javascript { "username": "", "message": "", "timestamp": "" } ``` For now, we are hardcoding the username as "David", but we will add the UI to input the username later. And when the message is sent, we are clearing the text area. ```javascript document.getElementById("message").value = ""; ``` `generateMessageHTML` Method The `generateMessageHTML` method accepts the `username`, `timestamp` and `message` parameters and generate the HTML for the message. Here we are adding the html that was inside our `li` tag and replacing the hardcoded values with variables. ```javascript function generateMessageHTML(username, timestamp, message) { let formattedTimestamp; if (new Date().toLocaleDateString() === new Date(timestamp).toLocaleDateString()) { // Same day, include only time formattedTimestamp = new Date(timestamp).toLocaleTimeString(); } else { // Not the same day, include date and time formattedTimestamp = new Date(timestamp).toLocaleString(); } const html = `
${username.charAt(0).toUpperCase()}
${username.charAt(0).toUpperCase() + username.slice(1)}
${formattedTimestamp}
${message}
` return html; } ``` The code is very straightforward, first, we are formatting the timestamp. We are checking if the message is sent today or not. If the message is sent today then we are just showing the time, and if the message was not sent today then we are showing both the date and time. For the profile picture, we are extracting the first text for the user's username and capitalizing it. We are also doing some formatting on the username, we are capitalizing the first letter of the username. Then we are returning the html string, that we have seen gets appended to the DOM. ## Step 7: Adding Persistence and Historical Messages As you can see from the above video, our chat works but it does not persist messages, and also there is no way to load historical messages. When the user refreshes the page all the previous messages disappear, and when a new user joins, the user cannot see the old messages. To solve this problem, we will store all the messages sent into our Redis database, and when a new user joins the chat room, we will send the historical messages to the user. ### Importing Redis In the top of the `server.js` file add the following lines: ```javascript // Importing redis client // By default the redis client connects to redis instance running at localhost:6379 const Redis = require("ioredis"); const redisClient = new Redis(); ``` These two lines will import the `ioredis` client and connect to the locally running Redis server. ### Installing Redis If you don't have redis running locally, you can quickly launch a redis instance using docker. Install docker and then run the following commands: ```bash docker pull redis ``` ```bash docker run -d -p 6379:6379 --name redis redis ``` ### Storing Messages in Redis Then in the `socket.on("message")..` code block add the following code to store the messages in the redis database. ```javascript redisClient.lpush("chat_messages", JSON.stringify(data)); ``` Here is the full code snippet ```javascript io.on("connection", (socket) => { // Handling socket connections. socket.on("message", (data) => { console.log(`Message arrived at ${process.pid}:`, data); redisClient.lpush("chat_messages", JSON.stringify(data)); io.emit("message", data); }); }); ``` ### Sending Historical Messages Now to send all the messages stored in Redis we will retrieve all the messages stored under the `chat_messages` list and send it when the client first connects. ```js io.on("connection", async (socket) => { // Fetching all the messages from redis const existingMessages = await redisClient.lrange("chat_messages", 0, -1); // Parsing the messages to JSON const parsedMessages = existingMessages.map((item) => JSON.parse(item)); // Sending all the messages to the user socket.emit("historical_messages", parsedMessages); .... ``` ### Receive Historical messages On the front-end we need to listen to the `historical_messages` event, and then loop through all the messages and append them to the `chat-messages` list. The code inside the `for loop` will be same as the code when we receive a single new message. ```javascript socket.on("historical_messages", function(messages) { for (let message of messages) { const html = generateMessageHTML(message.username, message.timestamp, message.message); const element = document.createElement("li"); element.innerHTML = html; document.getElementById("chat-messages").appendChild(element); } }); ``` As you can see in the demo above, the chat messages persist even after refreshing the page. ## Step 8: Adding Ability to Enter Username So far in our chat application, we have hard-coded the username. We will change that now and add the ability for the user to enter their own username. We will hide the chat user interface and just show the user a dialogue to enter their username to join. When the user types in their username, and press the join button we will save the username in a variable and show the chat interface. ### Join user dialogue The design for the join user dialogue is very simple, we will have just a text field and a "Join Chat" button. ![](cdn.hashnode.com/res/hashnode/image/upload/.. align="center") The user will type in the username in the text field and when the "Join Chat" button is pressed we will hide the Join Chat dialogue and show the chat user interface. Here is the HTML for the Join Chat Dialog: ```javascript

Join Chat


Join Chat
``` Here is the complete `index.html` file: ```xml Chat

Join Chat


Join Chat
``` ### Accepting the username In the above HTML code you can see that we have added id `join-chat-interface` to the "Join Chat" UI and we have added the id `chat-interface` to the chat room UI. We will add a click listener to the "Join Chat" button and remove the class `hidden` from the `chat-interface` and add it to the `join-chat-interface` div. ```javascript let USERNAME = ""; document.getElementById("join-chat").addEventListener("click", function() { const username = document.getElementById("username").value; if (username) { USERNAME = username; document.getElementById("chat-interface").classList.remove("hidden"); document.getElementById("join-chat-interface").classList.add("hidden"); } else { alert("Please type in a username"); } }); ``` In the above code snippet we have created a global variable named `USERNAME` . When the join chat button is clicked we are checking the value of the username text field. If the username text field is not blank, then we are assigning the value in the textfield to the global `USERNAME` variable, and removing the `hidden` class from the `chat-interface` and adding the `hidden` class to the `join-chat-interface`. And then in the `send-message` click event listener we updated the hardcoded text `"david"` with `USERNAME`. ```js socket.emit("message", { username: USERNAME, message: message, timestamp: new Date() }); ``` ## Step 9: That's It! and Improvements We have built a highly scaleable chat application, that leverages multiple CPU cores. But this chat app has limitations and improvements: * There is **no proper authentication mechanism**, as you have observed we are just strong the username as a string and passing it with the message. * There is **no validation and sanitization of the messages.** The message should be validated and sanitized before sending otherwise it poses severe cross-browser scripting security issue. * We are **sending all the messages at once**, there should be pagination through an infinite scroll * Missing modern chat features like emojis, file sharing, image sharing, reply to messages. * No way to moderate the chats. You can also use [Dead Simple Chat](deadsimplechat.com) which is a highly scaleable and secure pre-built [chat platform](deadsimplechat.com). It offers features like: * Moderation * Secure Single Sign On * Reply to messages * Private and 1-to-1 Chats * Advanced Analytics and more, ## Complete Source Code Here is the complete source code of the chat application that we have built. **package.json** ```json { "name": "chat-application", "version": "1.0.0", "description": "", "main": "server.js", "scripts": { "test": "echo \"Error: no test specified\" && exit 1" }, "keywords": [], "author": "DEAD SIMPLE CHAT", "dependencies": { "@socket.io/cluster-adapter": "^0.2.1", "@socket.io/sticky": "^1.0.2", "express": "^4.18.2", "ioredis": "^5.3.1", "socket.io": "^4.6.0" } } ``` **server.js** ```js const cluster = require('node:cluster'); const http = require('node:http'); const numCPUs = require('node:os').availableParallelism(); const process = require('node:process'); const { setupMaster, setupWorker } = require("@socket.io/sticky"); const { createAdapter, setupPrimary } = require("@socket.io/cluster-adapter"); const { Server } = require("socket.io"); const { info } = require('node:console'); const express = require("express"); // Importing redis client // By default the redis client connects to redis instance running at localhost:6379 const Redis = require("ioredis"); /** * Checking if the thread is a worker thread * or primary thread. */ if (cluster.isPrimary) { console.log(`Primary ${process.pid} is running`); /** * Creating http-server for the master. * All the child workers will share the same port (3000) */ const httpServer = http.createServer(); httpServer.listen(3000); // Setting up stick session setupMaster(httpServer, { loadBalancingMethod: "least-connection" }); // Setting up communication between workers and primary setupPrimary(); cluster.setupPrimary({ serialization: "advanced" }); // Launching workers based on the number of CPU threads. for (let i = 0; i < numCPUs; i++) { cluster.fork(); } cluster.on('exit', (worker, code, signal) => { console.log(`worker ${worker.process.pid} died`); }); } else { /** * Setting up the worker threads */ console.log(`Worker ${process.pid} started`); const redisClient = new Redis(); /** * Creating Express App and Socket.io Server * and binding them to HTTP Server. */ const app = express(); const httpServer = http.createServer(app); const io = new Server(httpServer); // Using the cluster socket.io adapter. io.adapter(createAdapter()); // Setting up worker connection with the primary thread. setupWorker(io); io.on("connection", async (socket) => { // Fetching all the messages from redis const existingMessages = await redisClient.lrange("chat_messages", 0, -1); // Parsing the messages to JSON const parsedMessages = existingMessages.map((item) => JSON.parse(item)); // Sending all the messages to the user socket.emit("historical_messages", parsedMessages.reverse()); // Handling socket connections. socket.on("message", (data) => { console.log(`Message arrived at ${process.pid}:`, data); redisClient.lpush("chat_messages", JSON.stringify(data)); io.emit("message", data); }); }); app.use(express.static('public')) } ``` **public/js/main.js** ```js const socket = io(); socket.on("message", function(data) { const html = generateMessageHTML(data.username, data.timestamp, data.message); const element = document.createElement("li"); element.innerHTML = html; document.getElementById("chat-messages").appendChild(element); }); socket.on("historical_messages", function(messages) { for (let message of messages) { const html = generateMessageHTML(message.username, message.timestamp, message.message); const element = document.createElement("li"); element.innerHTML = html; document.getElementById("chat-messages").appendChild(element); } }); let USERNAME = ""; document.getElementById("join-chat").addEventListener("click", function() { const username = document.getElementById("username").value; if (username) { USERNAME = username; document.getElementById("chat-interface").classList.remove("hidden"); document.getElementById("join-chat-interface").classList.add("hidden"); } else { alert("Please type in a username"); } }); document.getElementById("send-message").addEventListener("click", function() { const message = document.getElementById("message").value; socket.emit("message", { username: USERNAME, message: message, timestamp: new Date() }); document.getElementById("message").value = ""; }); function generateMessageHTML(username, timestamp, message) { let formattedTimestamp; if (new Date().toLocaleDateString() === new Date(timestamp).toLocaleDateString()) { // Same day, include only time formattedTimestamp = new Date(timestamp).toLocaleTimeString(); } else { // Not the same day, include date and time formattedTimestamp = new Date(timestamp).toLocaleString(); } const html = `
${username.charAt(0).toUpperCase()}
${username.charAt(0).toUpperCase() + username.slice(1)}
${formattedTimestamp}
${message}
` return html; } ``` **public/index.html** ```xml Chat

Join Chat


Join Chat

```